
MORFOHOUSE · GUIDES

Shower niches: practical storage, beautifully finished

A shower niche gives bottles and everyday essentials a place of their own, without a shelf projecting into the shower. Thoughtfully positioned and carefully finished, it can become a quiet detail—or a feature of the whole bathroom.
A practical guide · 4 min read
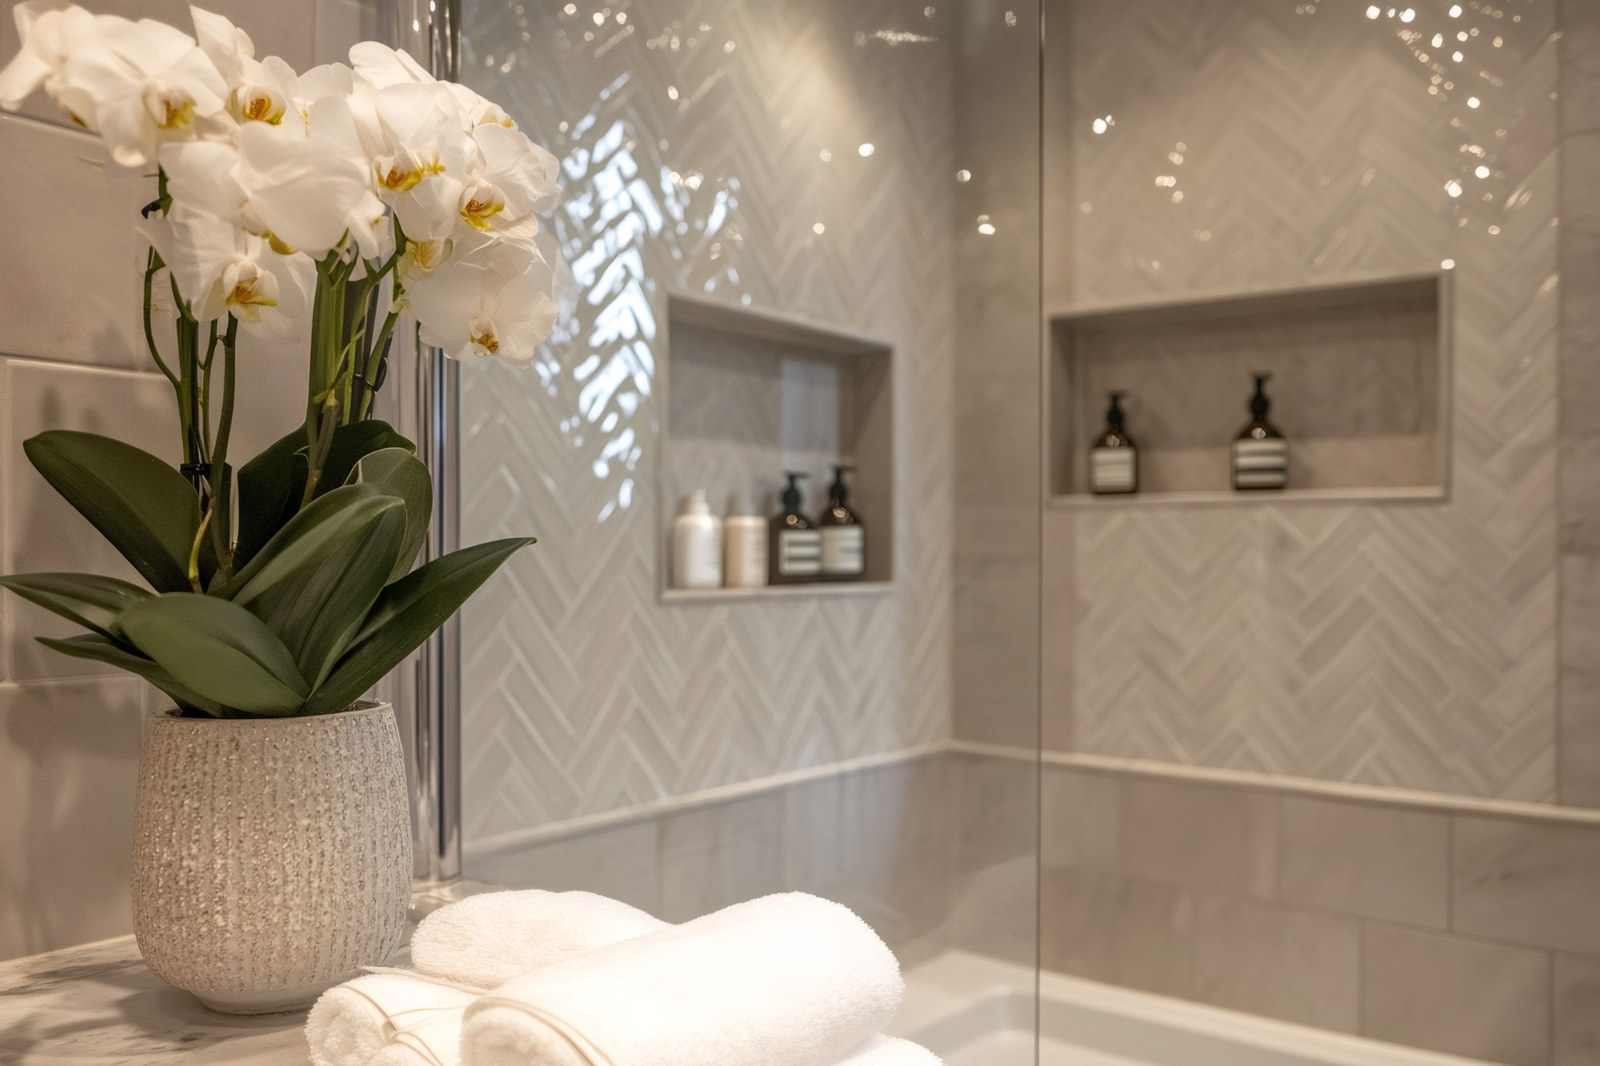
Shower niches within a herringbone tiled wall
Design inspiration

Start with what you need to store

Check your tallest bottles, including pumps, and allow room to lift them out comfortably. The useful dimensions are the finished internal dimensions, after waterproofing, tiles and shelves are fitted.

Position matters just as much as size. The niche should be easy to reach for the people using the shower, without awkward bending or stretching.

Which shape suits your bathroom?

One simple recess

A square or rectangular niche keeps the design restrained. It can blend into the surrounding tiles or stand out with a contrasting back panel.

A wide horizontal niche

A longer recess gives several products room and creates a strong horizontal line. Its proportions are considered alongside the shower and tile layout.

Storage at different levels

Separate recesses or a tall niche with shelves organise products into levels. Leave enough clearance for your bottles and keep every level easy to clean.

Can a niche go in any wall?

Not every wall can accommodate a recess. Its construction, available depth, pipes and cables need to be checked first. A shallow partition may need redesigning; a structural wall cannot simply be cut away to suit the preferred shape.

Sometimes a purpose-built wall or a surface-mounted shelf is the better solution. The design should suit the building as well as the bathroom.

The details behind a quality finish

A planned tile layout.

Position the niche alongside the tile joints, fittings and adjacent walls. Balanced cuts and deliberate alignment usually look more considered than a recess fitted wherever space remains.

Continuous waterproofing.

The inside, corners and connection to the shower wall must form part of a compatible waterproofing system. A prefabricated waterproof niche still needs its wall connection sealed correctly. Tiles and grout do not replace that protection.

Water that drains away.

The base and solid shelves should have a suitable fall towards the shower, following the chosen system’s instructions, so water does not sit in the recess.

Carefully chosen edges.

Tile trims, mitred edges or a suitable solid shelf can each create a different finish. The choice depends on the material, its thickness and how the edges will be used and cleaned.

What about lighting?

A softly lit niche can add atmosphere and highlight the texture of the tiles. It needs planning early: the lighting system, wiring and connections must suit the location and applicable electrical requirements, with access considered for future maintenance.

A niche that belongs in the room

At Morfohouse, the niche is considered alongside the tiles, fittings and lighting—not as an extra added at the end. SimpliPlan renders can help you compare its position and proportions before the work begins.

Shower waterproofing · Tile joints · Tile layouts

MORFOHOUSE · GUÍAS

Hornacinas de ducha: almacenaje práctico, acabado cuidado

Una hornacina permite guardar los botes y productos de uso diario sin que una repisa sobresalga dentro de la ducha. Bien situada y rematada, puede ser un detalle discreto o un elemento protagonista del baño.

Guía práctica · 4 min de lectura
Ducha con hornacinas integradas en un revestimiento en espiga
Inspiración de diseño

Empieza por lo que necesitas guardar

Comprueba la altura de tus botes más altos, incluidos los dosificadores, y deja espacio para sacarlos con comodidad. Las medidas útiles son las interiores una vez terminadas la impermeabilización, las baldosas y las repisas.

La posición importa tanto como el tamaño. La hornacina debe quedar al alcance de quienes utilizan la ducha, sin obligarles a agacharse o estirarse de forma incómoda.

¿Qué forma encaja en tu baño?

Un hueco sencillo

Una hornacina cuadrada o rectangular mantiene un diseño contenido. Puede integrarse en el revestimiento o destacar con un fondo diferente.

Una hornacina horizontal amplia

Un hueco largo ofrece espacio para varios productos y crea una línea horizontal marcada. Sus proporciones se estudian junto con la ducha y el despiece.

Almacenaje por niveles

Los huecos separados o una hornacina vertical con repisas permiten organizar los productos por niveles. Deja altura suficiente para tus botes y facilita la limpieza.

¿Se puede hacer en cualquier pared?

No todas las paredes admiten un hueco. Primero hay que comprobar su construcción, la profundidad disponible y el recorrido de tuberías y cables. Un tabique poco profundo puede necesitar un nuevo planteamiento; no se puede recortar sin más una pared estructural para conseguir la forma deseada.

A veces, un revestimiento sobre una nueva estructura o una repisa exterior es una solución más adecuada. El diseño debe adaptarse tanto al edificio como al baño.

Los detalles de un acabado cuidado

Un despiece planificado.

La posición de la hornacina debe estudiarse junto con las juntas, la grifería y las paredes contiguas. Los cortes equilibrados y las alineaciones deliberadas suelen dar un resultado más cuidado que un hueco colocado donde sobra espacio.

Impermeabilización continua.

El interior, las esquinas y la unión con la pared deben formar parte de un sistema de impermeabilización compatible. Una hornacina prefabricada impermeable también necesita un sellado correcto de su conexión con la pared. Las baldosas y el rejuntado no sustituyen esa protección.

Agua que evacúa.

La base y las repisas macizas deben tener una pendiente adecuada hacia la ducha, siguiendo las instrucciones del sistema elegido, para evitar que el agua quede retenida.

Remates bien elegidos.

Los perfiles, los cantos a inglete o una repisa maciza adecuada ofrecen acabados diferentes. La elección depende del material, su espesor y el uso y limpieza de esos bordes.

¿Y la iluminación?

Una hornacina con luz suave puede aportar ambiente y destacar la textura del revestimiento. Hay que preverla desde el principio: el sistema de iluminación, el cableado y las conexiones deben ser adecuados para su ubicación y cumplir los requisitos eléctricos aplicables. También hay que considerar el acceso para su mantenimiento.

Una hornacina integrada en el baño

En Morfohouse, la hornacina se estudia junto con las baldosas, la grifería y la iluminación. Los renders de SimpliPlan pueden ayudarte a comparar su posición y proporciones antes de empezar la obra.

Impermeabilización de duchas · Juntas entre baldosas · Patrones de colocación

◉ WhatsApp